

Living in a compact apartment or a cozy house does not mean you have to sacrifice style, comfort, or personality. In fact, small spaces offer a unique opportunity to get creative, experiment with bold designs, and maximize every single square inch of your living area. The challenge of limited square footage is not a limitation; it is an invitation to innovate. With the rise of urban living and the increasing popularity of minimalist lifestyles, the demand for smart, aesthetically pleasing, and functional small-space solutions has never been higher.
This comprehensive guide dives deep into the world of small-space DIY decor transformations. We will explore a plethora of projects that are not only budget-friendly but also highly effective in altering the perception of space, improving storage, and elevating the overall ambiance of your home. Whether you are a renter looking for temporary fixes or a homeowner planning a permanent renovation, these ideas will inspire you to see your small space in a whole new light.
The key to successful small-space decorating lies in three core principles: verticality, multi-functionality, and visual lightness. By focusing on these pillars, you can create an environment that feels open, airy, and inviting. Forget the notion that small rooms must be cluttered or dark. With the right DIY tactics, you can turn a cramped bedroom into a serene sanctuary, a tiny kitchen into a culinary haven, and a compact living room into a chic entertainment hub.
We understand that not everyone has the budget for expensive contractors or high-end furniture. That is why we emphasize do-it-yourself projects that utilize affordable materials, upcycled items, and a little bit of elbow grease. These transformations are designed to be accessible to beginners yet impressive enough to wow your guests. Furthermore, a well-decorated small space can significantly increase the perceived value of your property, making these DIY projects a worthwhile investment of your time and energy.
As we navigate through this guide, we will cover various aspects of small-space makeovers, including wall treatments, storage solutions, furniture hacks, lighting strategies, and color psychology. Each section is meticulously crafted to provide you with actionable steps, clear explanations, and inspiring ideas. By the end of this article, you will have a robust toolkit of skills and concepts to embark on your own transformation journey. So, roll up your sleeves, gather your supplies, and prepare to unlock the untapped potential of your home.
Chapter 1: The Magic of Vertical Space
One of the most common mistakes in small-space decor is neglecting the walls. We often focus on the floor plan and where to place the sofa or bed, but the vertical plane offers a vast, untouched frontier for storage and decoration. When you run out of floor space, you simply build up. Utilizing vertical space draws the eye upward, making the ceiling feel higher and the room more expansive. This is a classic interior design trick that architects and designers have used for centuries.
A. Floating Shelves and Ledges
Floating shelves are the unsung heroes of small-space organization. They provide storage without the bulky footprint of traditional bookcases. You can install them above desks, around windows, or along empty wall stretches. The DIY aspect comes into play when you choose the materials. You can create rustic wooden shelves from reclaimed pallets or purchase affordable brackets and pre-cut wood from hardware stores. Paint them to match your wall color for a seamless look, or choose a contrasting shade to make them pop as a design feature. Remember to stagger them for visual interest; placing shelves at different heights adds dynamism to an otherwise flat wall.
B. The Vertical Gallery Wall
A gallery wall is a fantastic way to inject personality into a compact area. However, in a small room, a standard gallery wall can sometimes feel chaotic. The solution is to create a vertical gallery a single, towering column of art pieces and photographs. This linear arrangement accentuates the height of the room. You can DIY custom frames from simple molding strips or repurpose old windows. The key is to curate a cohesive color palette. If your room has neutral tones, opt for black-and-white photography. If you have a colorful bohemian style, mix vibrant prints and textiles.
C. Tall Storage Units
If you must have a bookcase or a cabinet, go tall. Choose units that reach close to the ceiling. This maximizes storage capacity while minimizing the floor footprint. You can easily DIY a tall cabinet by stacking modular cubbies or building a custom plywood unit. Once installed, use the top shelves for items you rarely need, and keep everyday essentials within arm’s reach. To avoid a bulky appearance, opt for open shelving units or cabinets with glass doors. This transparency prevents the piece from blocking light and sightlines.
D. Hanging Planters
Plants bring life to a room, but floor pots can be a tripping hazard in tight spaces. Instead, create a vertical garden with hanging planters. You can macramé your own plant hangers using cotton rope, which is a very accessible DIY project. Or, you can attach small pots directly to the wall using wall-mounted planters. Cascading plants like ivy or pothos are particularly effective as they draw the eye down the wall, adding a layer of texture and color that softens the architectural lines of the room.
Chapter 2: Furniture That Works Double Duty
In a small home, every piece of furniture should serve at least two purposes. The era of single-function furniture is over when you are dealing with limited space. Multi-functional furniture is the cornerstone of efficient living. Not only does it reduce clutter, but it also provides flexibility, allowing you to transform a room from a workspace to a bedroom to a dining area in seconds. The DIY community has embraced this concept wholeheartedly, creating incredible hacks that are both stylish and practical.
A. The Storage Ottoman
A classic example of dual-purpose furniture is the storage ottoman. It acts as a footrest, a coffee table (with a tray on top), and a secret hiding spot for blankets, magazines, and remote controls. Making one yourself is easier than you think. You can repurpose a wooden crate, add caster wheels to the bottom, attach a hinged lid, and upholster the top with foam and fabric. Choose a bold fabric like velvet or a durable tweed to make it a statement piece in your living room.
B. Drop-Leaf and Folding Tables
Drop-leaf tables are miraculous for tiny dining areas or kitchens. You can fold them down when not in use to free up precious floor space for walking. A DIY drop-leaf table can be constructed using simple hinges and a wooden plank. You can mount it to the wall or let it stand on foldable legs. For those who work from home, consider a folding wall-mounted desk. When you finish your workday, simply fold it back against the wall. To enhance this, you can install a small magnetic whiteboard on the desk surface, so when it is folded up, it still serves as a message center.
C. Staircase Storage
For those living in loft-style apartments or two-story homes, the space under the stairs is often wasted. This area is perfect for built-in drawers, cubbies, or even a pull-out desk. If you are handy with a saw and a drill, you can create custom drawer units that fit precisely under the slope of the stairs. This is a high-impact project that significantly boosts storage without altering the structural integrity of the home. Paint the drawers the same color as the stairs to create a seamless, integrated look.
D. Beds with Drawers
In a small bedroom, the bed often takes up the majority of the floor space. If you are buying a new frame, opt for one with built-in drawers. Alternatively, you can DIY a platform bed with rolling storage bins underneath. Simply lift the bed frame on risers that are tall enough to accommodate plastic bins or wooden boxes on casters. This is a cheap and effective way to store seasonal clothing, shoes, or extra bedding. For an even more sophisticated look, you can build a headboard that includes side shelving for books and alarm clocks.
E. The Bench-Cum-Shoe Rack
Entryways in small homes are notoriously tight. A bench-cum-shoe rack solves the problem of where to sit to put on shoes and where to store them. Build a sturdy wooden box that is long enough to sit on, but deep enough to hold a row of shoes. Add a lid with hinges, and upholster the top for comfort. The interior of the box can be divided with wooden slats to create compartments for different pairs of shoes, keeping your entrance organized and tidy.
Chapter 3: The Illusion of Light and Color
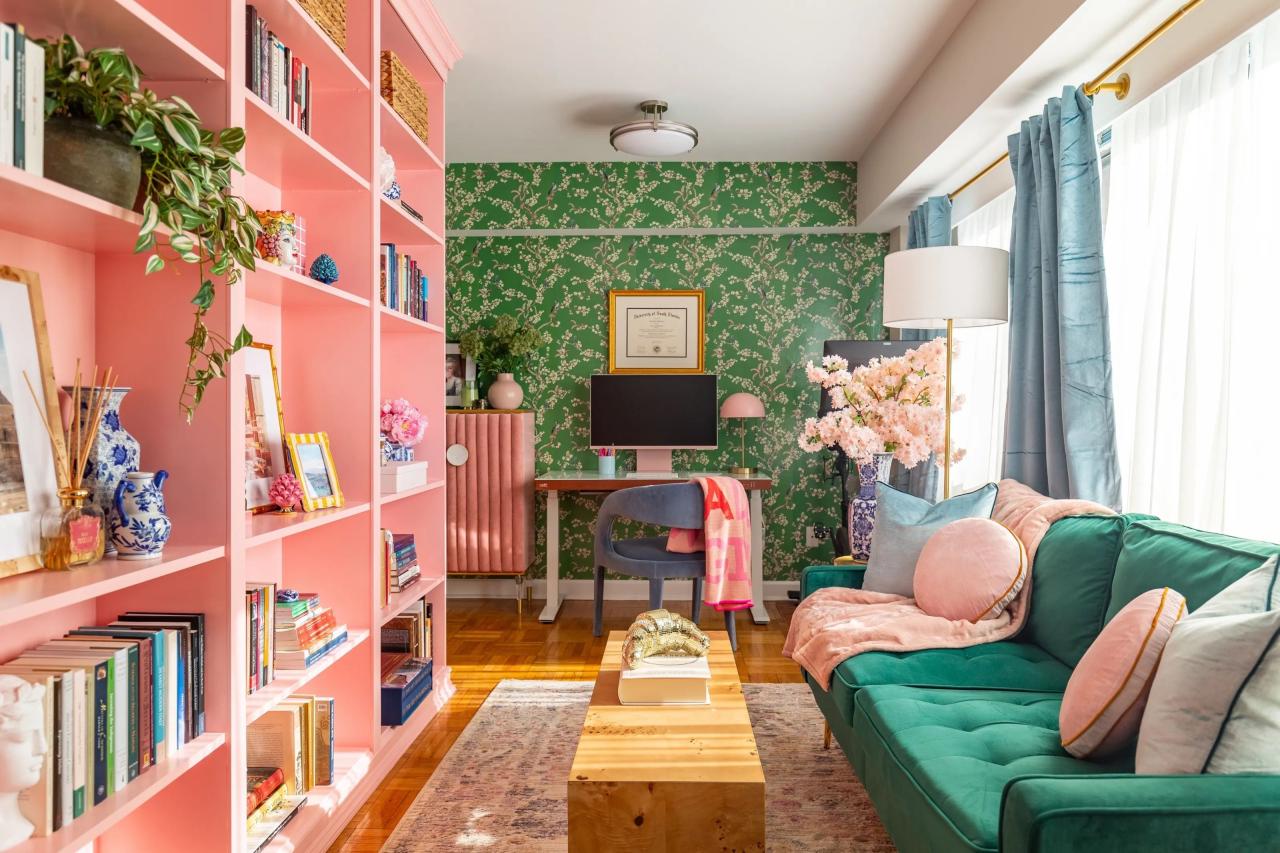
Color and lighting are the most powerful tools in a decorator’s arsenal, especially when dealing with small spaces. The right palette can make a room feel twice as large, while the wrong choices can make it feel like a cave. Light, both natural and artificial, plays a critical role in this illusion. The goal is to create a sense of openness and fluidity. A well-lit, light-colored room reflects sunlight, bouncing it around the space and blurring the boundaries of the walls.
A. The Monochromatic Palette
One of the most effective strategies for small spaces is the monochromatic color scheme. This involves using different shades, tints, and tones of a single color. For example, you could use a pale gray on the walls, a slightly darker gray for the sofa, and a charcoal gray for the accent pillows and rug. This lack of harsh color contrast allows the eye to travel smoothly across the room without interruption. It creates a feeling of continuity and spaciousness. You can easily achieve this by mixing your own paint tints or selecting off-the-shelf samples from the same color strip.
B. The Accent Wall “Trick”
While a monochromatic look is safe, some people crave a bold accent wall. In a small room, an accent wall can work if placed correctly. The rule of thumb is to place the accent color on the wall that is the farthest from the entrance. This draws the eye forward, elongating the room. Avoid dark colors on the side walls, as these will compress the space. For a DIY twist, consider using peel-and-stick wallpaper with a subtle geometric pattern on the accent wall. This is renter-friendly and adds a layer of texture that paint cannot replicate.
C. Layering Artificial Light
Relying on a single overhead light fixture is a cardinal sin in small-space decor. Harsh, direct lighting casts unflattering shadows and makes a room feel cramped. Instead, you must layer your lighting. This involves three types of light: ambient (general lighting), task (specific for reading or cooking), and accent (highlighting art or architectural features). You can DIY a variety of lighting fixtures. For instance, you can create a stunning pendant light using a wire basket and a light kit. Or, you can craft table lamps from vintage bottles and industrial pipe fittings.
D. Mirrors: The Ultimate Space Doubler
Mirrors are the oldest trick in the book for making a room feel larger, and for good reason they reflect light and create the illusion of depth. To maximize this effect, place a large mirror opposite a window. This will bounce the natural light around the room, effectively doubling the brightness. You can create a DIY mirror frame using molding or reclaimed wood to give it a custom, high-end look. Alternatively, arrange a collection of small, geometric mirrors on a wall in a grid pattern to act as a piece of art while also serving the functional purpose of expanding the space.
Chapter 4: Clever Storage Hacks for Clutter Control
Clutter is the enemy of a small space. When every surface is covered with knick-knacks, mail, and gadgets, the room feels chaotic and significantly smaller. Effective storage is not just about hiding things away; it is about organizing them in a way that is accessible and aesthetically pleasing. The best storage solutions are invisible or disguised as decor. DIY projects allow you to customize storage to fit your specific belongings and the unique dimensions of your room.
A. The “Hidden” Medicine Cabinet
Bathrooms are notoriously tiny. Instead of a simple mirror over the sink, build a recessed or surface-mounted medicine cabinet. If you cannot cut into the wall (due to rental restrictions), you can build a box that mounts on the wall and surrounds a standard mirror. Paint it the same color as the wall to make it blend in. Inside, add shelves to organize toiletries. This single project can free up your counter space immediately, making the bathroom feel more spacious and spa-like.
B. Utilizing Door Space
Doors are often ignored as storage real estate, but they are a fantastic spot for hanging organizers. You can DIY an over-the-door organizer using a curtain rod and S-hooks with baskets. This is perfect for cleaning supplies, pantry items, or craft materials. Furthermore, you can install a pegboard on the inside of a pantry or closet door. A pegboard is highly customizable; you can move pegs and hooks around to hold wrapping paper, hats, or scarves. This keeps these items off the floor and out of sight but still easily accessible.
C. Kitchen Wall Grids
In a tiny kitchen, counter space is gold. To keep the counters clear, move everything to the walls. Install a stainless steel grid or a piece of pegboard on a blank wall. Use hooks and small baskets to hold pots, pans, utensils, and even spices in matching jars. This open storage method is actually beneficial in a small space because it creates the illusion of a professional chef’s kitchen, turning functional items into part of the decor. A DIY spice rack made from magnetic jars attached to a metal strip is another great kitchen hack.
D. Rolling Carts for Flexibility
A rolling kitchen cart or utility cart is one of the most versatile pieces of furniture you can own. It can serve as a prep station, a coffee bar, or a portable nightstand. You can build one easily using wooden crates and caster wheels. Paint it a bright color to use as a pop of color in a neutral room. Because it rolls, you can move it out of the way when hosting parties, making your space incredibly flexible.
E. Sofa Table or Console Desk
The area behind the sofa is often a dead zone. By placing a slim console table behind it, you create a surface for lamps, books, and drinks. More importantly, it anchors the seating area and provides a visual break in an open-plan layout. You can DIY a console table using hairpin legs and a wooden plank. If you choose a plank with a live edge, you instantly add a touch of organic nature to your living room.
Chapter 5: Textures, Patterns, and Personal Touches
Once the storage and lighting are sorted, you can focus on the fun part: adding texture, pattern, and personality. These elements are what turn a house into a home. However, in a small space, you must be strategic. Too much pattern can be overwhelming, but too little can be boring. The sweet spot is a balance of textures that add depth without visual chaos.
A. Area Rugs for Zoning
In open-plan studios, area rugs are essential for defining different zones. You can use a rug to define the “living room” area and another to define the “bedroom” area. This creates visual separation without walls. A DIY rug makeover is possible by painting a flat-weave rug with stencils. This is a cost-effective way to get a custom-designed rug that exactly matches your color scheme. Choose rugs with a low pile to ensure they don’t trip you up in narrow walkways.
B. Throw Pillows and Cushions
Pillows are the easiest and cheapest way to change the mood of a room. In a small space, use pillows to introduce pops of color or interesting textures like velvet, wool, or silk. You can sew your own pillow covers using old sweaters or fabric remnants. The DIY possibilities here are endless. For a cohesive look, choose a color palette of three colors and distribute them across the pillows, throws, and art.
C. Statement Curtains
Curtains are often overlooked, but they play a massive role in how large a window appears. To make the window look bigger, install the curtain rod higher than the window frame and wider than the frame. This tricks the eye into believing the window is larger. For a DIY touch, sew contrasting trim onto plain curtains. This adds a custom designer detail without the cost. Sheer curtains are preferable for small spaces as they allow natural light to filter through while providing privacy.
D. Upcycled Decor
Adding personality means displaying items you love, but this doesn’t mean you have to buy expensive art. Frame your own photography, concert tickets, or fabric swatches. You can also upcycle old items. For example, turn an old ladder into a blanket rack. Transform mason jars into stylish drinking glasses or candle holders. These personal projects not only save money but also ensure that your home is entirely unique.
Chapter 6: Detailed Step-by-Step DIY Projects
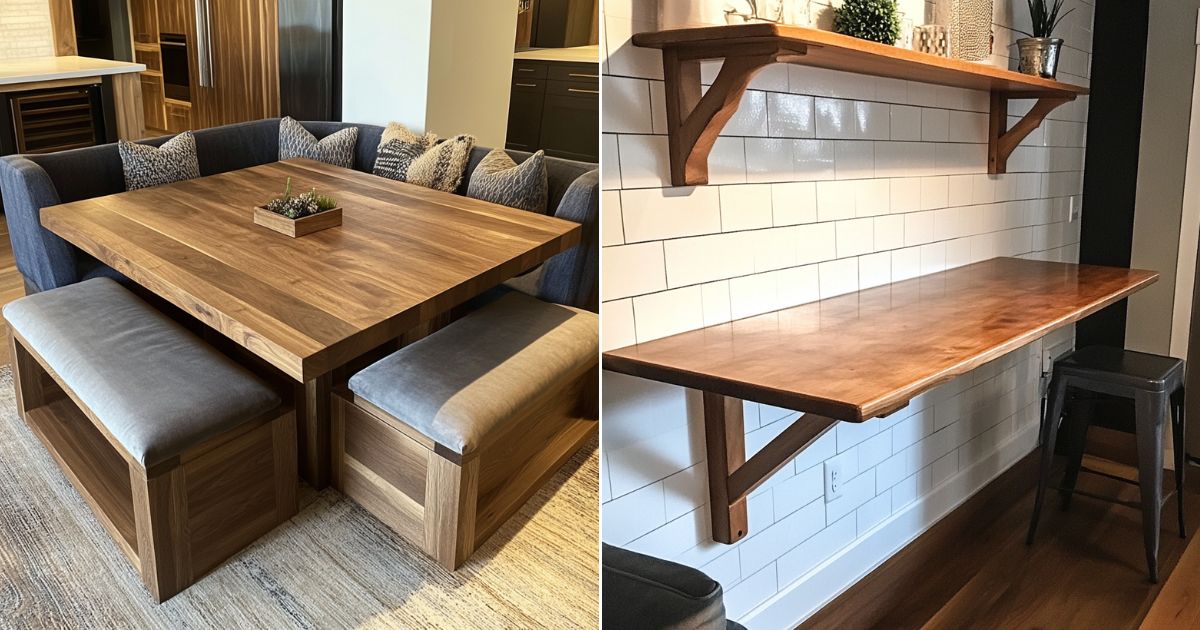
To help you get started immediately, here are three detailed DIY projects tailored for small spaces. Each project is designed to be completed in a weekend with basic tools.
Project 1: The Wall-Mounted Fold-Out Desk
This desk is perfect for tiny home offices or living rooms.
Materials needed: One wooden plank (at least 60cm x 100cm), two heavy-duty folding brackets, wood screws, wood stain or paint, a spirit level, and a drill.
Step 1: Start by staining or painting your wooden plank. Allow it to dry completely.
Step 2: Hold the folding brackets against the wall at your desired height. Use a spirit level to ensure they are perfectly horizontal. Mark the screw holes.
Step 3: Drill pilot holes into the wall studs or use wall anchors for drywall. Attach the brackets securely.
Step 4: Place the wooden plank on top of the brackets. Screw it in place from underneath to secure it.
Step 5: Attach a small shelf underneath the desk for storage, or a magnetic strip for holding notes. When folded down, it acts as a sleek shelf.
Project 2: The Under-Bed Storage Bins
Create custom storage bins that slide under the bed with ease.
Materials needed: Plywood sheets, wood glue, nails, caster wheels, fabric or paint, handles.
Step 1: Measure the height under your bed. Subtract 2 cm from this measurement to ensure the bins slide in easily.
Step 2: Cut your plywood into a box shape (bottom, four sides). Assemble the box using wood glue and nails.
Step 3: Paint or wrap the box in fabric to match your bedroom aesthetic.
Step 4: Attach caster wheels to the bottom corners. This is crucial for easy sliding.
Step 5: Attach small handles to the front face. Use these bins to store out-of-season clothes or extra linens.
Project 3: The Hanging Macrame Shelf
This is a bohemian-inspired shelf that doesn’t require wall drilling.
Materials needed: A wooden plank, strong cotton rope (about 4 meters), a drill, scissors, and a hook for the ceiling.
Step 1: Drill four holes in the corners of your wooden plank.
Step 2: Cut your rope into four equal pieces.
Step 3: Thread a piece of rope through each hole and tie a tight knot underneath the plank.
Step 4: Gather all four ropes at the top. Tie them together in a large knot, leaving a loop for hanging.
Step 5: Hang the shelf from the ceiling hook. Adjust the knots so the plank hangs level. Place small plants or books on this shelf to add greenery and interest.
Conclusion: The Journey of Transformation
Transforming a small space is a journey, not a destination. It involves constant tweaking, rearranging, and reimagining. The beauty of DIY is that it allows you to evolve your space as your needs change without breaking the bank. Whether you are building a fold-out desk for your new remote job or creating vertical storage for your growing book collection, every small project contributes to a larger, cohesive aesthetic.
Remember, the goal is not to mimic a magazine spread exactly. The goal is to create a sanctuary that reflects your personality and supports your lifestyle. Embrace the constraints of a small space; they are the very thing that fuels your creativity. By utilizing vertical space, investing in multi-functional furniture, mastering the illusion of light, and implementing clever storage hacks, you can make your small home feel expansive.
We hope this comprehensive guide has empowered you with the knowledge and confidence to pick up your tools and start making changes. Start with one room, or even just one corner. Paint a wall, build a shelf, or reupholster a stool. These small victories will build momentum, and soon you will find yourself looking at your home with fresh eyes, seeing potential everywhere. The space may be small, but the possibilities are endless. Happy decorating